

[ad_1]
The Web3 Information API from Moralis allows builders to get all transactions for an Aptos account in a simple approach. With this interface, you may seamlessly get Aptos account transactions by means of a single API name. All it’s worthwhile to do is add your API key and specify the handle you wish to question:
import fetch from ‘node-fetch’;
const choices = {
methodology: ‘GET’,
headers: {
settle for: ‘utility/json’,
‘Bearer’: ‘YOUR_API_KEY’
},
};
fetch(‘https://mainnet-aptos-api.moralis.io/accounts/:handle/transactions’, choices)
.then(response => response.json())
.then(response => console.log(response))
.catch(err => console.error(err));
By calling the endpoint above, you’ll obtain a JSON response with data such because the transaction hash, the sender handle, a timestamp, and way more. Here’s a pattern of what the response may appear to be:
{
“hash”: “0x88fbd33f54e1126269769780feb24480428179f552e2313fbe571b72e62a1ca1”,
“sender”: “0x88fbd33f54e1126269769780feb24480428179f552e2313fbe571b72e62a1ca1”,
“sequence_number”: “32425224034”,
“max_gas_amount”: “32425224034”,
“gas_unit_price”: “32425224034”,
“expiration_timestamp_secs”: “32425224034”
},
When working with Moralis, Aptos growth doesn’t must be harder than that! So, if you wish to construct on Aptos, keep in mind to enroll with Moralis instantly. Creating an account is free and solely takes a few seconds!

Overview
In right this moment’s article, we’ll present how simple it’s to get Aptos account transactions when working with Moralis. As an instance the accessibility of Moralis, we’re going to create an utility in solely three steps, permitting you to constantly get all transactions for an Aptos account:
Clone the App and Set Up MoralisBackend – Get All Transactions for an Aptos AccountFrontend – Deal with the Response
By finishing these steps, you’ll discover ways to create a NodeJS utility to get Aptos account transactions utilizing the Moralis Web3 Information API. In case you are desperate to get into the code, click on right here and leap straight into the tutorial!
In case you are new to the Web3 growth area, you won’t be all that aware of Aptos. Because of this, we’ve got devoted a number of sections towards the tip of the article to exploring this community in additional element. As such, if you’re new to Aptos or wish to refresh your recollections, we advocate beginning within the ”Aptos 101 – What’s Aptos Labs?” part.
Together with industry-leading, enterprise-grade Web3 APIs, Moralis gives further blockchain growth assets. As an illustration, with Moralis, you may simply discover one of the best and most accessible cryptocurrency taps. If you wish to be taught extra about this, take a look at our information on what a Goerli testnet faucet is, or discover ways to get testnet APT utilizing an Aptos testnet faucet!
Additionally, earlier than persevering with, keep in mind to register with Moralis immediately. You may create an account without spending a dime; you will want one to observe alongside on this tutorial!
Tutorial: The best way to Get Aptos Account Transactions
On this tutorial on get all transactions for an Aptos account, we’ll present you create a simple NextJS app with an Categorical backend server. The app will assist you to constantly get Aptos account transactions by merely inputting an handle and hitting a button.
To fetch the related blockchain information, we’ll use the Web3 Information API from Moralis. In doing so, we solely want a single API name to get all the mandatory data; it doesn’t get extra accessible than that!

What’s extra, to make this information as seamless as doable, we will likely be utilizing an already ready utility template to which you solely have to make a number of configurations. Together with this, we’ll cowl the important elements of the backend and frontend code to provide you an thought of how the app works behind the scenes.
Nevertheless, earlier than leaping into step one of this tutorial, we’ll present a quick utility demo. This offers you an thought of what you’ll be working towards, making it simpler to visualise what the code does!
Software Demo – Get Aptos Account Transactions Constantly
Allow us to leap straight into the Aptos account transactions demo and check out the app’s touchdown web page:
The highest of the app options two principal parts, an enter subject and a submit button:

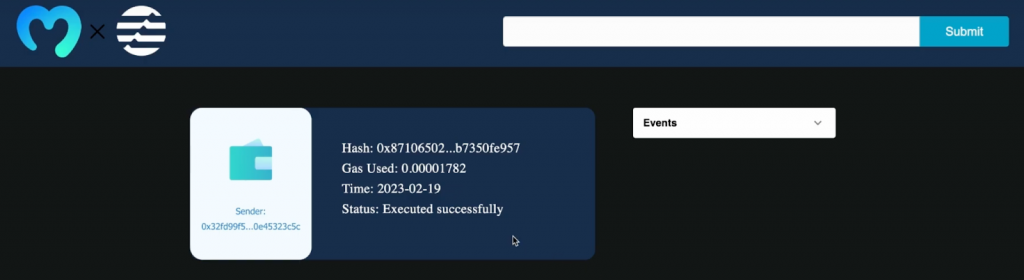
By inputting an handle and hitting ”Submit”, the applying calls the Moralis Web3 Information API to fetch the transaction particulars. From there, the knowledge for every transaction is neatly displayed on the app’s consumer interface:
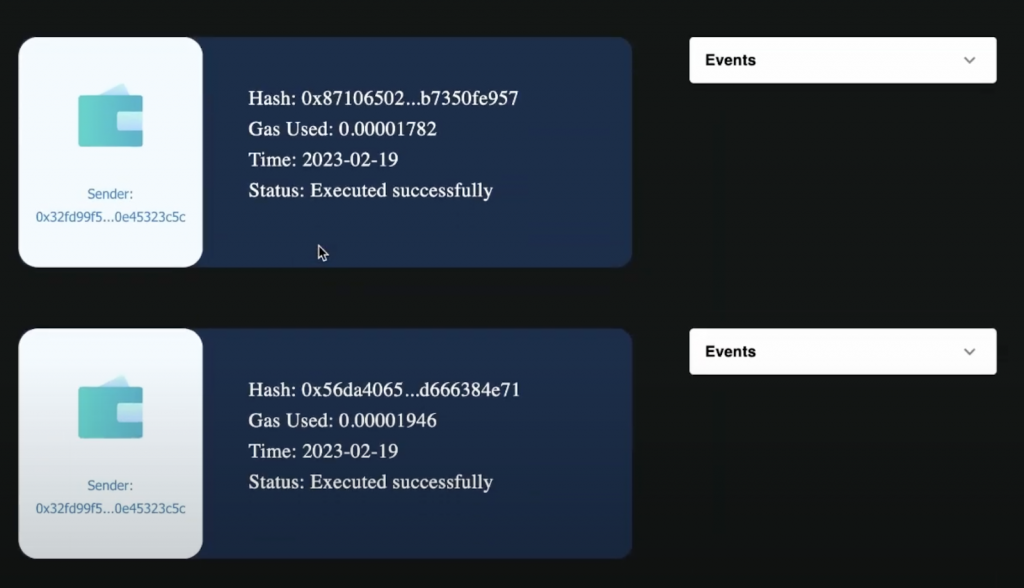
First up, we’ve got a card with transaction particulars. This consists of the sender handle, transaction hash, fuel used, and many others.:

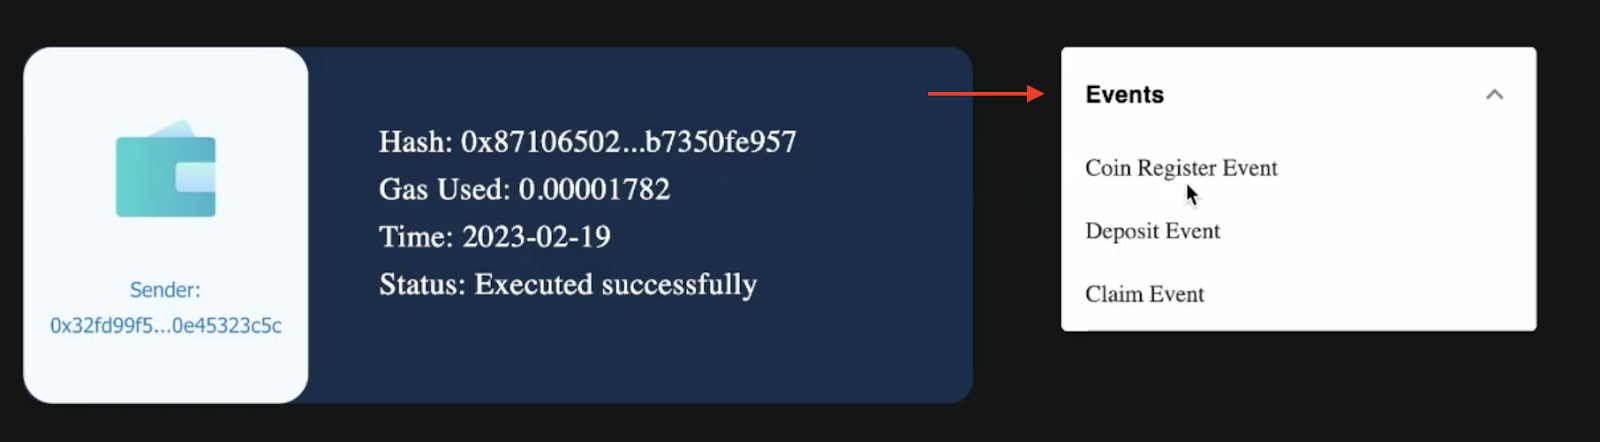
Subsequent, the app additionally options an ”Occasions” drop-down menu. This menu lists all of the occasions related to the actual transaction:
That’s it for this Aptos account transactions utility demo! Now that you realize what you’ll be working in direction of, allow us to leap straight into step one, the place we’ll present you clone the app and arrange Moralis!
Step 1: Clone the App and Set Up Moralis
To start with, arrange a brand new challenge folder and open it in your most popular built-in growth atmosphere (IDE). With a challenge folder at your disposal, you may go forward and clone the applying utilizing the GitHub repository down under:
Full Aptos Account Transactions App – https://github.com/MoralisWeb3/youtube-tutorials/tree/principal/get-aptos-account-transactions
With a duplicate of the app in your native listing, you need to now end up with a frontend and a backend folder:
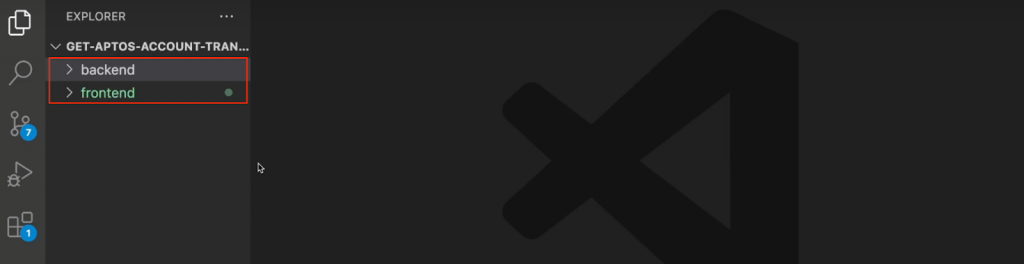
Open the backend folder and create a brand new ”.env” file. This file will host your atmosphere variables, and on this case, you solely want so as to add a Moralis API key. As such, open this file and add the next code:
MORALIS_API_KEY = “replace_me”
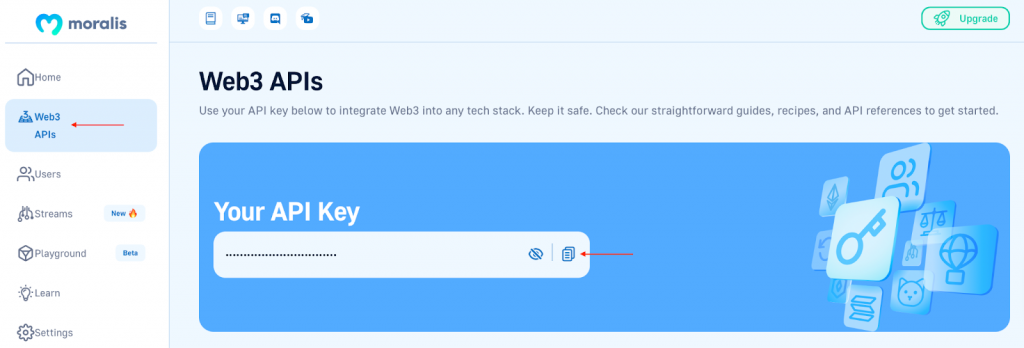
As you may see, it’s worthwhile to substitute replace_me along with your precise key. So, when you have not already, create your Moralis account now. With an account at hand, you’ll find your key by logging in to the admin panel and navigating to the ”Web3 APIs” tab:
When you add your API key as an atmosphere variable, you are actually technically prepared to start out the app. Nevertheless, within the continuing steps, we’ll break down the important elements of the frontend and backend code to provide you a greater understanding of what occurs behind the scenes!
Step 2: Backend – Get All Transactions for an Aptos Account
For the backend code, we’ll give attention to the ”index.js” file, as that is the place we discover many of the utility logic. On this file, we begin by importing the mandatory dependencies. This consists of fetch, categorical, cors, dotenv, and many others.:
import fetch from “node-fetch”;
import categorical from “categorical”;
const app = categorical();
const port = 5001;
import cors from “cors”;
import dotenv from “dotenv”;
dotenv.config();
Subsequent, we additionally import the Moralis API key atmosphere variable from the ”.env” file with the next line of code:
const MORALIS_API_KEY = course of.env.MORALIS_API_KEY;
We then use the API key to create an choices object:
const choices = {
methodology: “GET”,
headers: {
settle for: “utility/json”,
“X-API-Key”: MORALIS_API_KEY,
},
};
From there, we arrange a get endpoint the place we initially fetch the pockets handle from the frontend and use this as a parameter when calling the Web3 Information API endpoint to get all transactions from the Aptos account. Lastly, we ship the response to the frontend, the place we are able to extract all of the values and show them to the customers:
app.get(“/getaccounttransactions”, async (req, res) => {
const { question } = req;
attempt {
fetch(
`https://mainnet-aptos-api.moralis.io/accounts/${question.handle}/transactions`,
choices
)
.then((response) => response.json())
.then((response) => {
return res.standing(200).json(response);
});
} catch (e) {
console.log(`One thing went fallacious ${e}`);
return res.standing(400).json();
}
});
That’s it for the important elements of the backend code; allow us to now transfer on to the frontend!
Step 3: Frontend – Deal with the Response
For the frontend code, we take a better take a look at the ”principal.js” file. On this file, we begin by making the required imports, together with useState, axios, Picture, and many others.:
import { useState } from “react”;
import axios from “axios”;
import Picture from “subsequent/picture”;
import { Card, Illustration } from “@web3uikit/core”;
import {
Accordion,
AccordionSummary,
AccordionDetails,
Typography,
} from “@mui/materials”;
import ExpandMoreIcon from “@mui/icons-material/ExpandMore”;
import types from “@/types/Dwelling.module.css”;
import MoralisLogo from “../public/property/moralis.png”;
import AptosLogo from “../public/property/aptos_white.png”;
Subsequent, we transfer on to the Predominant() operate, the place we begin by including three state variables: walletAddress, outcome, and showResult:
export default operate Predominant() {
const [walletAddress, setWalletAddress] = useState(“”);
const [result, setResult] = useState([]);
const [showResult, setShowResult] = useState(false);
From there, we add the handleChange() operate that runs when the consumer varieties within the enter subject to replace the walletAddress variable:
const handleChange = (e) => {
setWalletAddress(e.goal.worth);
};
Subsequent, we’ve got the handleSubmit() operate that executes at any time when the consumer clicks on the ”Submit” button. This operate is accountable for making the request to the backend Categorical server utilizing Axios after which dealing with the response:
const handleSubmit = async () => {
doc.querySelector(“#inputField”).worth = “”;
const response = await axios.get(
`http://localhost:5001/getaccounttransactions`,
{
params: { handle: walletAddress },
}
);
setResult(response.information);
setShowResult(true);
};
Lastly, the rest of the code takes care of rendering the outcome.
That’s it for this temporary code breakdown overlaying the important elements!
Congratulations! You may have now efficiently created an utility permitting you to get all transactions for an Aptos account! All that is still from right here is spinning up the Categorical server and launching the applying!
If you’d like a extra detailed rationalization of every half, please take a look at the clip under. On this Moralis YouTube video, certainly one of our gifted software program engineers covers the code in even additional element:
Aptos 101 – What’s Aptos Labs?
Aptos is the brainchild of Aptos Labs, the group behind this blockchain community. The Aptos Labs workforce consists of a various set of builders, engineers, and strategists led by the 2 co-founders: Mo Shaikh and Avery Ching.

Shaikh and Ching met whereas working collectively on Meta’s Diem challenge, they usually began Aptos Labs in 2021. Inside a 12 months of making the group, Aptos Labs efficiently launched their ”Autumn” mainnet in 2022.
The central aim of Aptos Labs is to supply merchandise and construct purposes on the Aptos community to redefine the consumer expertise in Web3. The Aptos Labs workforce is ready to develop improved community usability and tooling. By way of this, they need to make the decentralized net prepared for the plenty!
What’s the Aptos Community?
The Aptos mainnet is known as ”Aptos Autumn” and was formally launched final 12 months in October of 2022. Aptos is a layer-1 (L1) proof-of-stake (PoS) community with the aim of turning into probably the most scalable and quickest blockchain on the earth.
Aptos was designed with scalability, usability, safety, and reliability because the community’s 4 core rules. Moreover, it’s by means of these rules that Aptos goals to convey the decentralized net to the plenty.
Aptos options innovation in system safety, sensible contract design, consensus, and decentralization. As well as, the community leverages the Transfer digital machine and Transfer programming language, each optimized for Web3 use instances.
The native forex of Aptos is known as ”APT”. This token is crucial for the community’s ecosystem as it’s used to pay for transactions on Aptos. APT can be staked, offering those that stake a proper to take part in transaction validation on the community. As a reward, stakers obtain further APT for his or her work.
Nonetheless, if you would like a extra detailed breakdown of this community, please take a look at our article answering the ”what’s the Aptos blockchain?” query!
Develop on Aptos with Moralis
Now that you’re extra aware of the Aptos community, you is perhaps asking your self, ”what’s the best solution to construct on Aptos?”. The reply to this query is Moralis! Moralis is the premier Web3 infrastructure supplier, enabling you to construct decentralized purposes (dapps) and different Web3 platforms in a heartbeat!

By way of industry-leading, enterprise-grade APIs and real-time blockchain information, Moralis is ready to make Web3 growth as simple as Web2. Furthermore, on this article, you bought to familiarize your self with the Web3 Information API, the most well-liked listed blockchain information supplier. With this software, you may seamlessly question information concerning every little thing from NFTs to transactions with only some strains of code.
One other nice instance is the Web3 Streams API. With this programming interface, you may simply arrange a Moralis stream to get notified at any time when one thing of curiosity happens on-chain. This implies you may get instantaneous, customizable updates when occasions set off primarily based in your filters.
You also needs to discover Moralis’ cross-chain capabilities. Moralis helps a number of totally different networks, together with Aptos, enabling you to construct chain-agnostic tasks. This implies you don’t restrict your self to at least one community and may simply port tasks throughout networks with minor code configurations. As such, if you’re severe about turning into a Web3 developer, be sure to enroll with Moralis!
Additionally, if you’re curious about Aptos growth, take a look at our Aptos NFT tutorial!
Abstract – Get All Transactions for an Aptos Account
In the present day’s article confirmed you create an utility permitting you to constantly get all transactions for an Aptos account. When utilizing the app, all it’s worthwhile to do is enter a pockets handle and click on a button. Furthermore, because of the accessibility of the Web3 Information API from Moralis, you have been capable of arrange this utility in three steps:
Clone the App and Set Up MoralisBackend – Get All Transactions for an Aptos AccountFrontend – Deal with the Response
So, when you have adopted alongside this far, you are actually aware of get Aptos account transactions. From right here, you may hopefully combine comparable performance into any future Aptos tasks!
When you discovered this tutorial informative and instructive, you may additional be taught Web3 growth right here on the Moralis weblog. As an illustration, if you wish to construct extra subtle tasks, take a look at our information on Web3 market growth or discover ways to create a DAO!
Additionally, if you’re severe about turning into a blockchain developer, don’t forget to enroll with Moralis. With an account, you get free entry to enterprise-grade Web3 APIs from Moralis and may leverage the ability of Web3 to the fullest!
[ad_2]
Source link


